
Every once in a while I revisit a practice and approach it from first principles to see if I can learn something that previously I might have missed or otherwise evolve my understanding in some ways. This time its TDD…yet again. Having recently completed several weeks of pairing with a junior engineer on one of my teams, having worked through several design katas and having read a lot of opinion on how “TDD doesn’t work”, I came away with some reflections on my practice of TDD and its effect on design that I want to share. By no means this is a complete treatment of all the value propositions, this space is quite complex and context dependent. I am sure my thinking and practice will evolve in the future but this post represents my current thinking and practice on the subject.
This is a 2 part series because I wanted to talk about the workflow and design aspects of TDD and that’s quite a bit for a single post.
For this part I am using the canonical definition of TDD as laid out by Kent Beck, also his book TDD By Example and, Jason Gorman’s excellent tutorial on TDD.
Make a List and Check it Twice
At the beginning of a session, I typically tend to think ahead about not only the tests we want to write but also any refactorings of the existing code we want to come back to in this session a bit later. Its a check list of sorts and it allows me to remember all those things that we looked at and said, “we should probably address this soon!”.
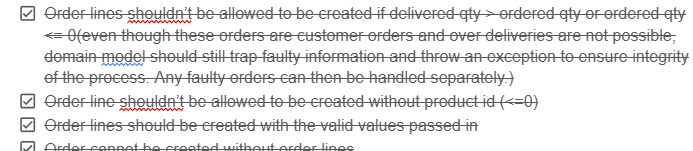
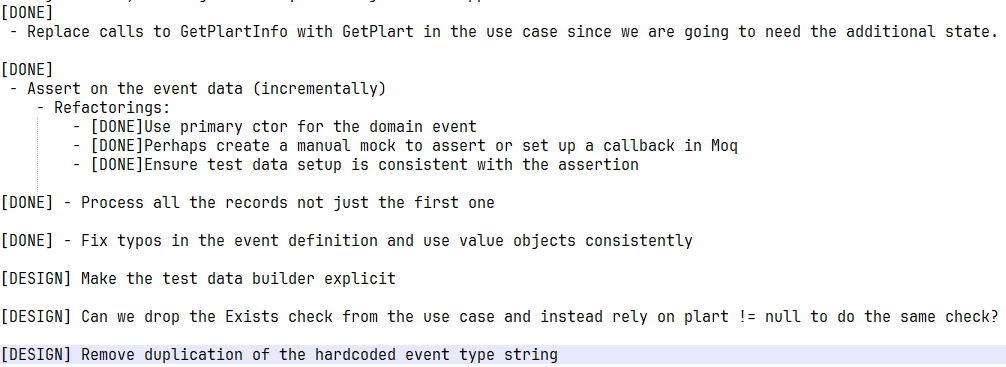
During the course of the session, it really helps to keep the focus on current problem at hand and not get too side tracked into refactoring rabbit holes prematurely. Any opportunities to refactor or redesign that we come across, we append to this list so we don’t forget. And as we work through these items in our checklist, we mark them DONE. Reviewing this list regularly helps keep a track of what’s done, what’s pending and what’s not necessary anymore. Externalising your brain like this, is quite freeing. No particular format or fancy tools required, just note down top to bottom what you want to do, in a notepad (physical or electronic).
One Test at a Time
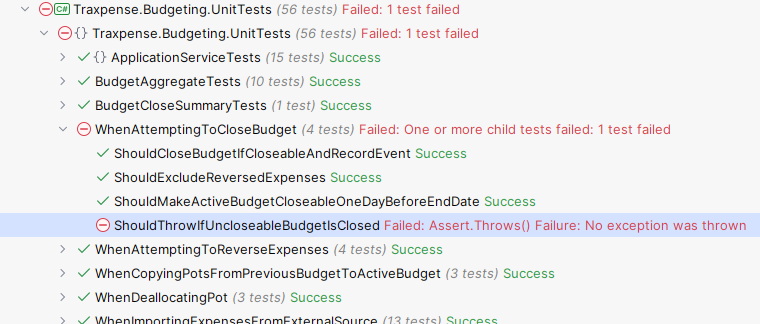
Always start with a failing test, this is a non-negotiable step in TDD and comes right after the list! If I am not starting here, I am not doing TDD I am doing something else.
One of the mis-interpretations of TDD I have seen in the wild, that people use to claim that TDD doesn’t work, is that they think they have to write all possible tests upfront before writing any code, and then try to make them all pass. This is a mistake! Tests are supposed to be about fast feedback and incremental changes, by writing more code than necessary, I am giving myself too wide a problem space to worry about all at once and I run the risk of getting stuck in a rabbit hole of writing too much test code or too much production code. Neither is conducive to incremental changes because both suffer from making it harder to find what caused the code to work (or not work). With one change at a time, you know its the last change that caused it work (or not work).
Kent’s Canon TDD highlights the importance of listing all the tests you need, but only implementing one at a time, completing it and then choosing the next one carefully. Whenever I have tried writing more than one failing test at a time, I have almost always had more rework to do due to the design having evolved in a direction that made tests 2 through 7 redundant. Same argument goes against writing too much production code before a test has necessitated its existence.
During our pairing session, I observed the same rush several times and we had to slow down, take a step back, refocus on what are we trying to test, and only write code that we know we need now because we know we will refactor later in the session. We refactored but only what was necessary for that test to work and work well. We had to be disciplined about not refactoring too much pre-emptively or anticipatorily. This feels slow but the likelihood of the test being complete when I say its completed, goes through the roof. Otherwise, in the short term I can go fast by jumping ahead but all the time gained will be lost when I have to rework the code because we missed something fundamental or made a wrong assumption or just didn’t pay attention to design.
Failing Test, Fast
I try to optimise for getting to first failing test as fast as possible. What I found particularly a nice way to ensure that we are driven by tests (what Jason Gorman calls “start with the question” in his tutorial) and can get to failing test quickly, is to write the assertion first and then generate the missing code needed to get it to pass until it fails again. Rinse and repeat.
A simple example, let’s say I am writing a test for calculating squares of natural numbers, but instead of using the arrange -> act -> assert sequence, which was my default for a long time, I will go the opposite way and simply write the assertion first:
| [Fact] | |
| public void SquareOfNumberShouldBeNumberMultipliedByItself() | |
| { | |
| actualSquare.Should().Be(expectedSquare); | |
| } |
At this point the code doesn’t even compile so that’s already a test failure of sorts. Now I can use my IDE’s inbuilt refactoring tools to incrementally generate the code I need for the test to fail for the right reason.
| [Fact] | |
| public void SquareOfNumberShouldBeNumberMultipliedByItself() | |
| { | |
| object actualSquare; | |
| object expectedSquare; | |
| actualSquare.Should().Be(expectedSquare); | |
| } |
I will then fill these pieces as necessary, generating code that doesn’t exist including any system under test (in this case the Square function), and get the test to fail for the right reason:
| [Fact] | |
| public void SquareOfNumberShouldBeNumberMultipliedByItself() | |
| { | |
| var actualSquare = Square(2); | |
| var expectedSquare = 4; | |
| actualSquare.Should().Be(expectedSquare); | |
| } | |
| public int Square(int number) | |
| { | |
| return 0; | |
| } |
Now we can go to work on making the test pass for the right reason. Working in the classical arrange -> act -> assert cycle, can lead to pre-mature test code e.g. I might copy and paste a whole bunch of test set up from another test and then modify it for what I need, but there is a danger that I have pasted in too much without realising that maybe 30% of it isn’t actually needed for my test. This noise accumulates and leaks in other tests over time (we love our copy-pasta) and can make them harder to reason about. Working back from assertion firmly establishes the expectation from the get go and heavily informs the rest of the pieces (data setup, SUTs, test doubles etc), so I am only adding test code that I know I need. I might later on refactor the test code and then reuse some set up but I will do so with a better understanding of what I don’t need.
Use Triangulation
Explained in both Kent’s book and Jason’s tutorial, Triangulation essentially is, whilst in TDD loop, hard code the expected values in your system under test until you get a sense of a good generalised algorithm that can handle all cases.
In the test above, I can simply hard code the Square function to return 4, the value expected by the test:
| public int Square(int number) | |
| { | |
| return 4; | |
| } |
Next I will go back and change my test input from 2 to 3, and now the test will fail again, then I will do:
| public int Square(int number) | |
| { | |
| if (number == 2) | |
| return 4; | |
| else | |
| return 9; | |
| } |
Looks absolutely ridiculous, doesn’t it? Do I not know how a Square function works? Why am I wasting time delaying the obvious? Obviously users want number * number, be done with it and move on to the next thing! And I certainly could in this very simple system, as a matter of fact, right after the first hard code I will generalise and parameterise my test to make sure most possible input ranges are covered.
But there is an argument to be made in favour of moving incrementally and focussing on only one problem (or a part of it) at a time. Techniques like Triangulation can be quite effective at creating focus on one assertion at a time, especially when the system under test (SUT) is relatively complex. It allows me time to form a good mental model of the problem and slowly ease into the problem I am trying to solve. Otherwise, my focus will be derailed into writing more implementation than necessary, instead of letting the test inform what code is missing.
For simpler SUTs or where hardcoding once is sufficient to indicate the need for generalisation or where my mental model of the problem is reasonably complete, triangulation can be entirely skipped. But you can only build that sense when you triangulate first. I think a good heuristic here is: hardcode once -> try generalise -> too much head scratching? –> go back to hardcoding/triangulation until head scratching is not needed anymore and we can generalise.
We used this technique to good effect during our pairing sessions as well and as weird and annoyingly backwards the process felt, its value slowly became clearer: progressively build a clearer mental model of the problem at hand, identifying gaps in the design as we go by writing just enough code to make the test fail for the right reason and then write just enough code to make the test pass for the right reason!
As an example, instead of asserting on all object properties we needed right away:
| Assert.Equal(someObject.Property1, ...); | |
| Assert.Equal(someObject.Property2.Type,...); | |
| Assert.Equal(someObject.Property3.Source, ...); |
We initially only asserted that the object wasn’t null and progressively added more asserts each of which required a small change in the production code, until we had a complete test:
| Assert.NotNull(someObject); |
Pause at Red
When taking a break (I tend to do this often enough to relax and refocus) or switching roles during a long pairing session (> 1 hour), I always aim to stop at a failing test. Then I know exactly where to pick up when we get back – gotta make this test pass! Simplez!
This way the cost of context switching is practically zero (especially if you are also diligently keeping a checklist). The break can then actually feel like a break, and not an extended mental debugging session.
If I have been following all of the above, then typically, I will have only one failing test at a time which once again brings focus and incrementality to the dev cycle. This also worked quite well in my pairing session, we benefitted from a smoother continuity of work without forgetting critical things.
Avoid Debug Limbo
Before I adopted automated testing into my practice, my only way to find out if the code worked or not was by debugging it or running the system and doing things with it. There can be something enlightening about debugging and seeing variables change state when functions execute, or threads switch context. Even though a lot is still hidden, quite a bit is revealed. However, it comes at a cost of “context ejection”, during debugging we tend to get deep into the internals that we can forget what’s the problem we were trying to solve in the first place, and even after a debugging session, we still might not know if the system will/does work or how.
That’s why I tend to avoid step-thru debugging as far as possible, or if I get into it, I try not to stay there for too long. I instead prefer to use the effort I’ve already put into writing a test to think through what might be happening and adjust test or code accordingly until the thing works. Occasionally, I might still go in debug mode, but I remind myself, “trust the damned test, that’s why you write it! TDD is not a substitute for thinking.”
In the final part, I will talk about how I think about and approach the design aspects of TDD and scoping of tests. Stay tuned…

One Reply to “Reflections on TDD and Software Design – Part 1”